Integrating BirdNET-Pi with Home Assistant Using MQTT
- Objective
- Understanding
- Home Assistant MQTT broker
- MQTT-Explorer
- Birdnet-Pi
- Notifications
- Troubleshooting
- Home Assistant Sensor Setup
- Create the Dashboard Card
- References
Objective
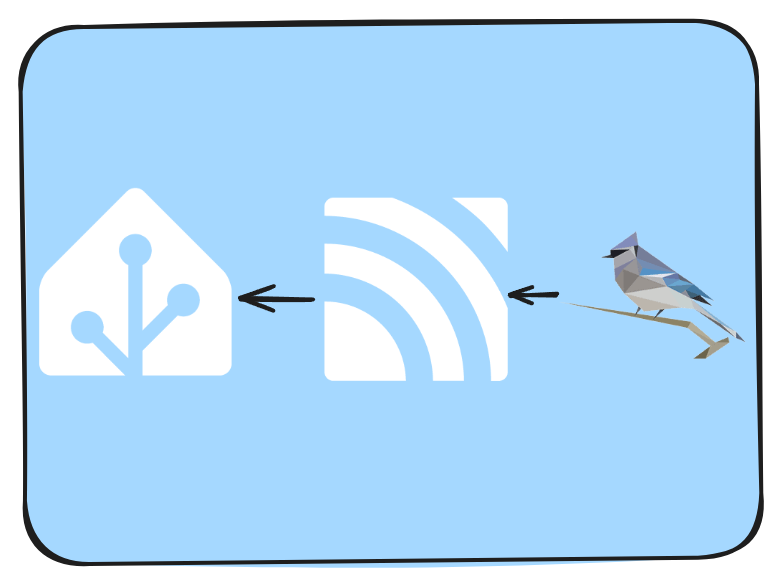
I want to be able to report my bird detections to Home Assistant. With this I can create automation, cards, grafana graphs, custom notifications etc. A lot of this is going to be based off Phil Prices work, I just didnt have the experience to follow those instructions and get it working. This blog attempts to add some clarity to that blog post.
Understanding
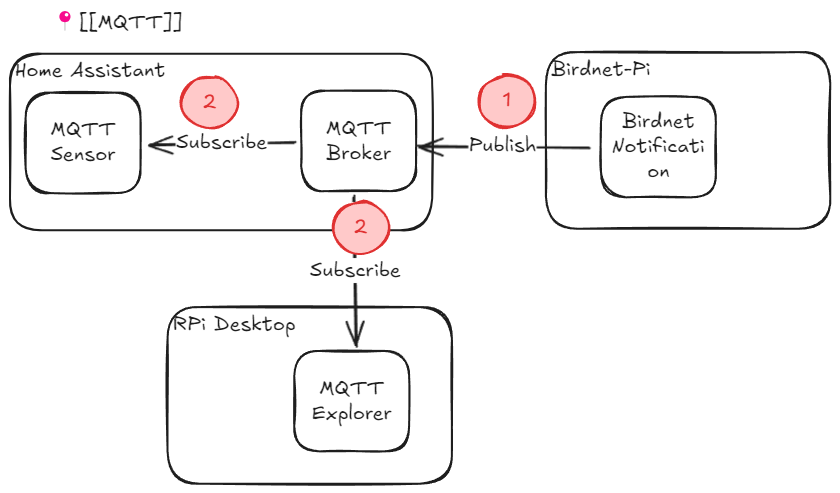
First I had to have some understanding of MQTT. The workflow is comprised of a MQTT Broker, and subscriber model. Subscribers sign up for specific “topics” and get the notification relayed to them via the broker whenever a device publishes to that topic. Home Assistant sensors subscribe to topics for their data
Format of the notification in Birdnet-Pi
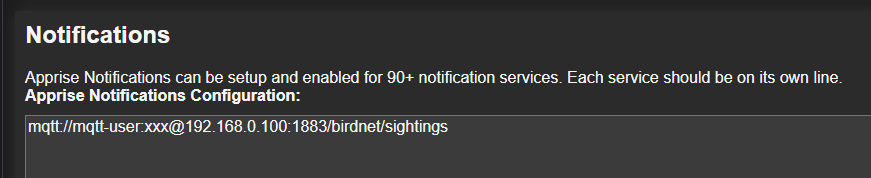
mqtt://username:[email protected]:1883/birdnet/sightings
birdnet/sightings - is the “Topic”
There is also a payload, or the actual data of the message. In Birdnet-Pi this is the “Notification Body” in which you can put various parameters
So lets get all the components installed and configured.
Home Assistant MQTT broker
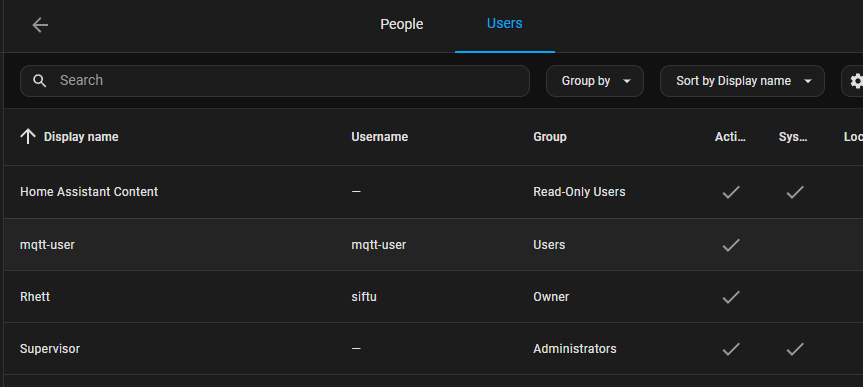
Before installing the add-on, create a new user/serviceaccount for people to authenticate with
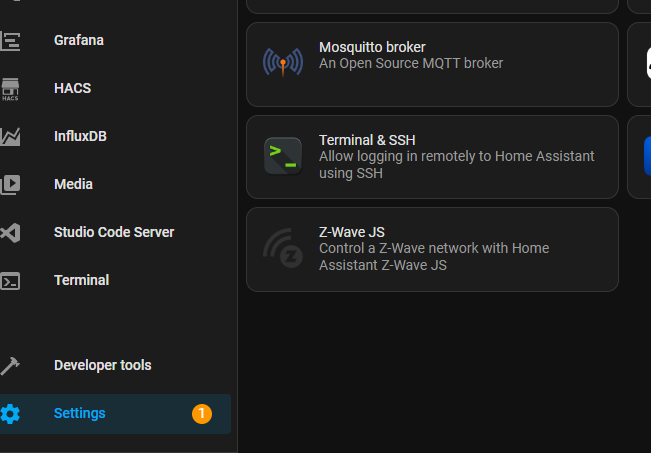
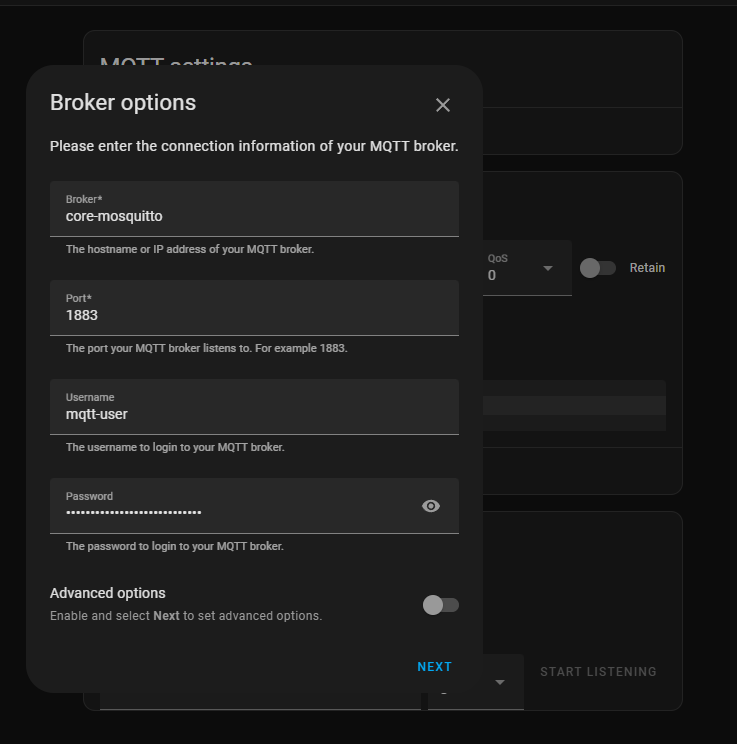
This requires installing the Add-on “Mosquitto broker.” This is an official add-on, dont use the HACS ones.
 And then configuration of the broker using the username/password
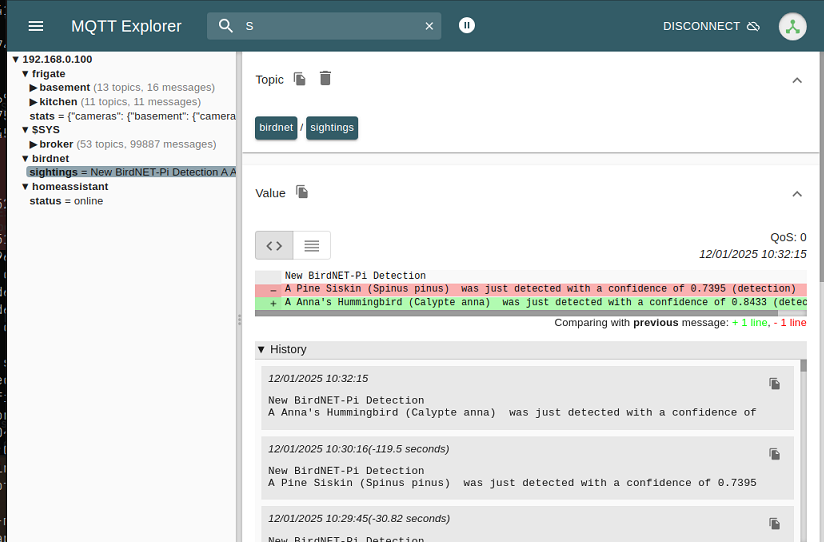
MQTT-Explorer
This is a useful tools for creating and subscribing to topics and helps with troubleshooting to ensure everything is working. Its like having a spy on the MQTT bus. I installed it on a linux desktop and connected it to the HA MQTT broker.
Birdnet-Pi
The only thing to really setup is the notification under Tools -> Settings in Birdnet
Notifications
The new notification body can now be
  "Common_Name": "$comname",
  "Scientific_Name": "$sciname",
  "Confidence_Score": "$confidence",
  "link": "$listenurl",
  "Date": "$date",
  "Time": "$time",
  "Week": "$week",
  "Latitude": "$latitude",
  "Longitude": "$longitude",
  "Minimum_Confidence": "$cutoff",
  "Sigmoid_Sensitivity": "$sens",
  "Overlap": "$overlap",
  "Image": "$flickrimage" }
And the “Notification Title” must be removed as this breaks the json
Check in MQTT-Explorer that valid json payloads are being sent if you click “Test”. You really want valid json payloads as this makes getting values out using the templates much much easier.
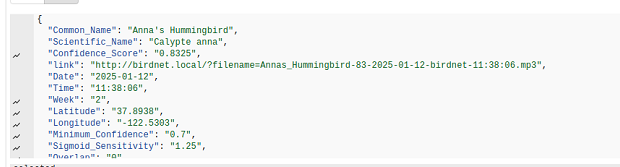
This will give us all the data we need to represent in future.
Troubleshooting
I went down the rabbit hole a few times because my lack of understanding lead me to believe there was an environmental issue. This was not the case, but I’m leaving my trouble shooting steps in here as it contains some useful information about the BirdNet python virtualenv
The On the Birdnet machine python virtualenv seems to be at ~/BirdNET-Pi/birdnet/bin
You can activate this
birdnet:~/BirdNET-Pi/birdnet$ source bin/activate
You can test an apprise message like so. Just change out the variables to your Home Assistant setup
apprise -vvv -b 'test' "mqtt://username:[email protected]:1883/birdnet/sightings"
Check the version of apprise (less than 2.0)
pip3 list

Package                   Version
------------------------- ------------
altair                    5.4.1
apprise                   1.9.0
Home Assistant Sensor Setup
Now that we have all the pieces setup and basic testing complete. Its time to bring it all together. We need to set a sensor up to subscribe to the birdnet/sightings topic and parse the payload
In Home Assistant, separate from the Mosquito Broker add-on, there is a client add-on called MQTT
This is configured with edits to the configuration.yaml or one of it’s included yamls.
We need to break up our payload into individual values, we use a “value template” for this
https://www.home-assistant.io/docs/configuration/templating/#using-templates-with-the-mqtt-integration
I added the following to configuration.yaml
# Birdnet sensor
mqtt:
  sensor:
    - name: "Birdnet sightings"
      state_topic: "birdnet/sightings"
      json_attributes_topic: "birdnet/sightings"
      value_template: ""
After saving and restarting HA, the values should start appearing
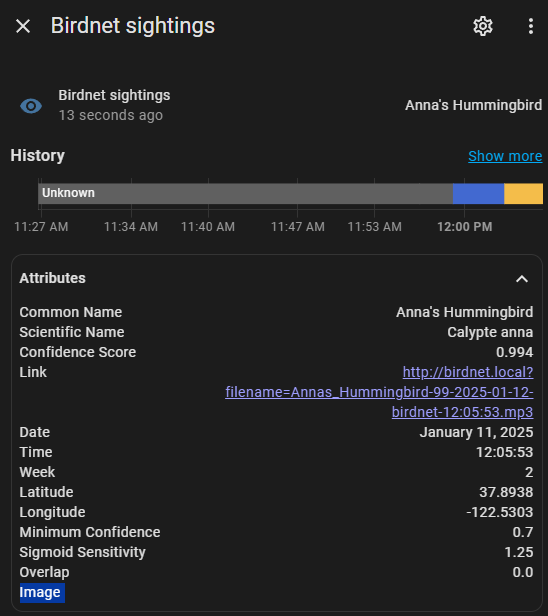 The Image attribute is empty. I believe this has to do with the flickr API integration in BirdNet-Pi. Update: I entered an API key and the image field is now populated.
Create the Dashboard Card
You’ll need mushroom and stack-in cards to replicate this setup. I installed them via HACS and added the folling to configuration.yaml
template:
  - image:
      - name: Bird-Pi Photo
        verify_ssl: false
        url: ""`
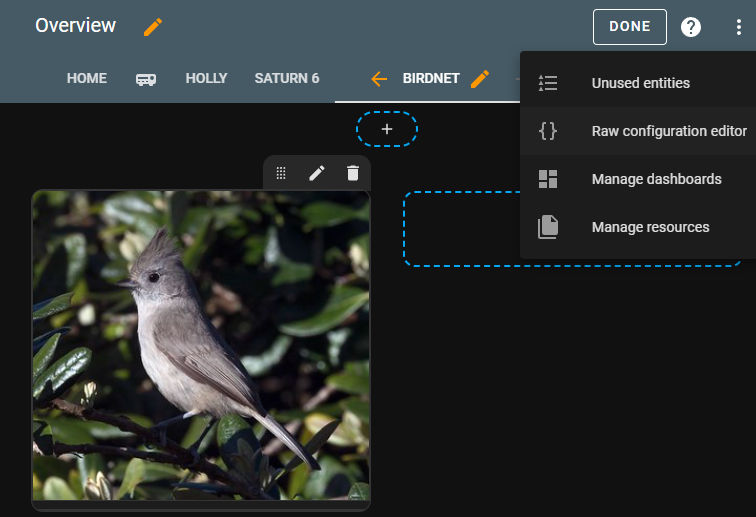
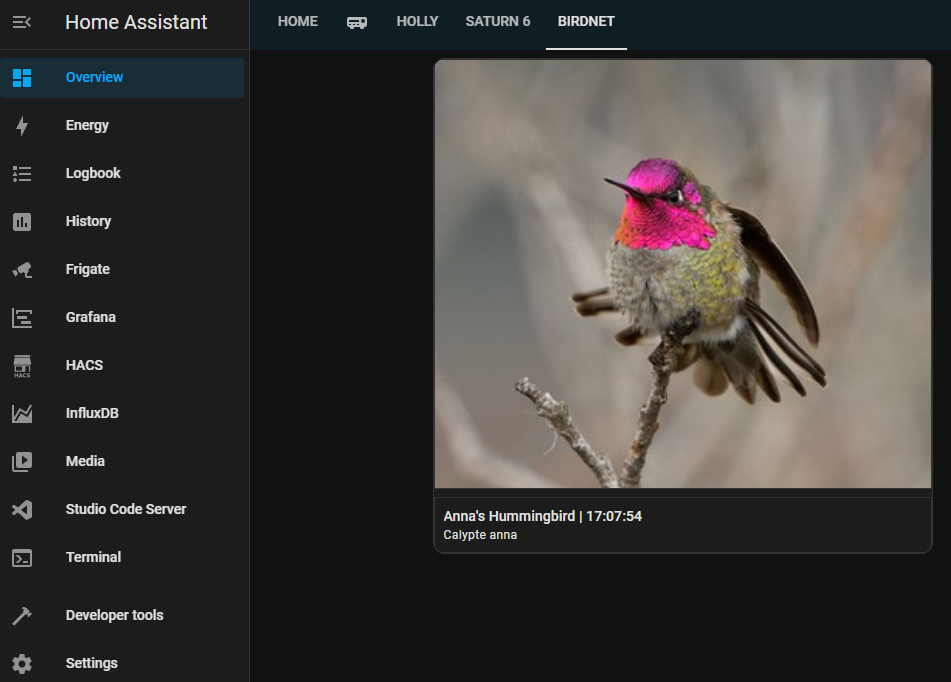
To get the nice representation on a HA dashboard we need to setup a card “Mushroom template”, it can be blank, we then go in a edit it. Do this via the GUI and then edit the dashboard “Raw configuration editor”
My card content ended up being
  - type: sections
    title: Birdnet
    cards: []
    sections:
      - type: custom:stack-in-card
        cards:
          - show_state: false
            show_name: false
            camera_view: auto
            type: picture-entity
            entity: image.bird_pi_photo
          - type: custom:mushroom-template-card
            primary: >-
              {{states.sensor.birdnet_sightings.state}} |
              {{states.sensor.birdnet_sightings.attributes.Time}}
            secondary: '{{states.sensor.birdnet_sightings.attributes.Scientific_Name}}'
            entity: sensor.birdnet_sightings
            icon: ''
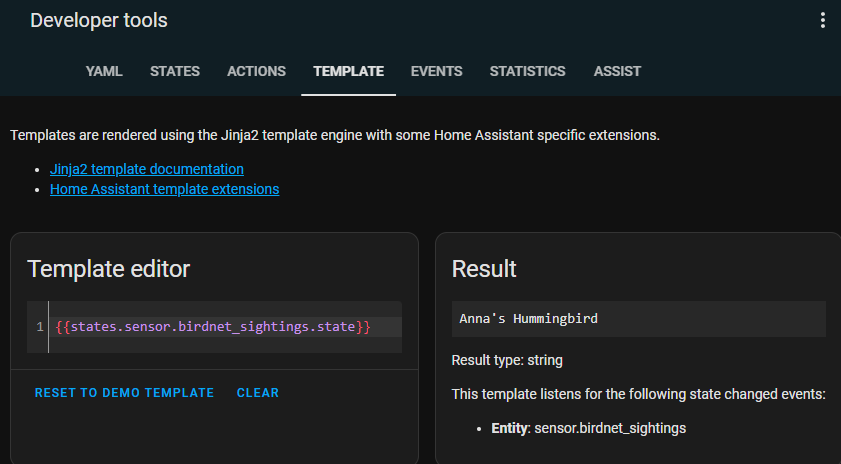
Just a note, I used the developer tools to see the values of the attributes. I got these wrong a number of times and this helped a lot.
and here is the finished product
References
https://wander.ingstar.com/projects/birdnetpi.html
https://github.com/mcguirepr89/BirdNET-Pi/discussions/321
https://www.phillprice.com/post/show-birdpi-detections-in-home-assistant/
https://www.home-assistant.io/integrations/sensor.mqtt
https://community.home-assistant.io/t/how-to-template-mqtt-sensor-json-as-entity-attributes/460875/12